How to take moon pictures
Wednesday, December 21, 2011
How to take moon pictures
by: Glenn Posadas
Well, first of all, I recommend you to use DSLR, SLR. These Single-Lens-Reflex Cameras are widely used by professionals because they can be used in any field of photography. Their lens can be changed. Anyways, when taking moon pictures, telephoto lenses s
hould be used! Such as the following:
(click the photo to enlarge. Blacks are for Nikon, White for Canon)
Any kind of 70-200mm will do. 70-200mm with or without image stabilizer/VR. Of course its better to use with such IS/VR.
OR, you can use longer telephoto lens! That will be so good for you!
As for me, since I'm merely a poor-wanna-be-not-talented-young-photographer slash a teenager with a dslr, I use 70-300mm Tamron Lens.

So, if you're ready now, take your gears, put your lens into your camera now, and bring a tripod.
Note: TRIPOD is used if your lens has no IS/VR.
Question: What if I don't have both?
Answer: Well, in that case, you should adjust your shutter speed faster.
I woke up early today because I have to attend a Christian Conference, a great conference woah!!! And then, suddenly, as I was walking, I saw the moon! Woah! Beautiful moon, it was around 6:00AM. Good thing I brought my camera and my classmate's tamron lens. So I took a photo of the moon.
Your settings should be:
1. Fast shutter speed - Around 1/200th or greater. This is to avoid blur.
2. Large Opening of Aperture - I think I usually use f11.
3. ISO - 200 or lower. If your hands always shake and you always destroy your photo, you should sacrifice your ISO. What I mean is you should get your ISO higher because you will be adjusting your shutter speed much faster.
Note: The greater the number of your ISO, the more grains or noise will appear in your photo.
So, after we take a photo of the moon using the longest focal length of our lens, we can now import our photos into Adobe Lightroom, or you can just use photoshop if you're pro with it. :P

And then, Crop your photo, since I'm again a merely poor-wanna-be-not-talented-young-photographer slash a teenager with a dslr, I just crop my photo to make the subject larger. :) So therefore, if you have a great camera/latest camera, then you are so blessed, it means you can have a high resolution photo. Going on, after cropping, adjust your exposure if needed, the clarity, hue, saturation.
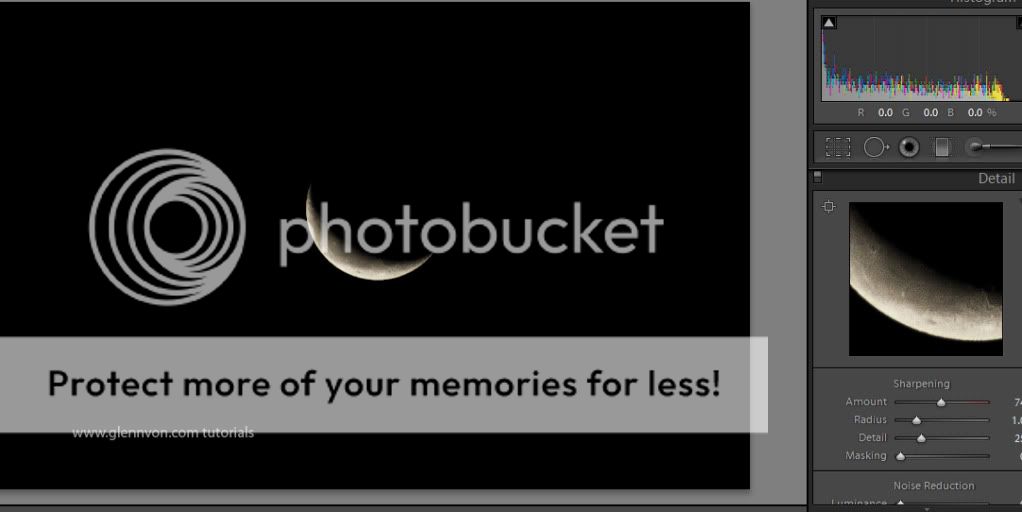
And lastly, the most important 'thang' is adjusting the crispiness xD a.k.a sharpness of our photo, just like this:
Note: Adding sharpness in our photo is adding noise at the same time, that's why I recommended you a while ago to use less number of ISO so that you can add more sharpness without adding more grains or noise.

So, that's all! You can now export your picture and share it to the world!
Here are my other photos:
click em to enlarge


sharing is sexy, so share it!
Sharing is so Easy: |
Labels:
photography tutorials,
turorial


